Build the project
In order to successfully publish your project, it must first be able to build successfully.
Start by building your project. Right-click the project and select "Build".
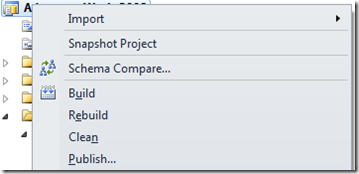
If the build is successful, the project can be published.
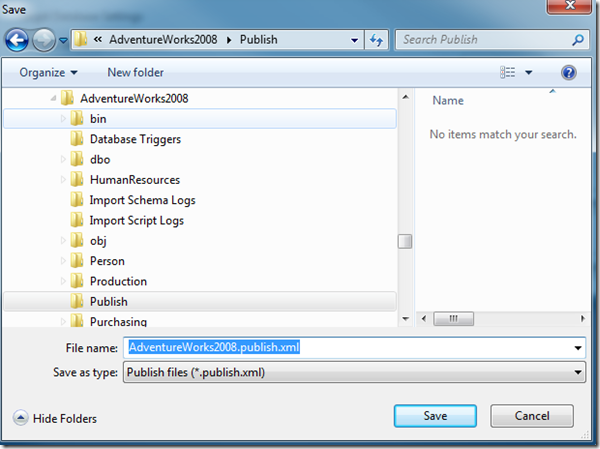
You may want to create a folder within your project to store saved Publish Profiles. These can be used later to easily publish the project to your servers.

Creating Publish Profiles
Right-click the project and select Publish. This will bring up the Publish Database dialog.
- Choosing to publish or opening a saved publish profile will initiate a build of the project.

Choose your target database, set your advanced options (similar to Schema Compare options), and choose the "Save Profile As" option to save this to a location within your project. Selecting the "Add profile to project" option will create the publish profile in the root of the project. You may wish to either move the file to a folder storing all of your publish profiles or, if you saved it without adding to the project, show all files of the project so you can include the file in the project.
Some options you may want to consider:
- "Always re-create database" - this will re-create the database. Any data in the database will be lost.
- "Block incremental deployment if data loss might occur" - If there are any changes that could result in the publish action failing because of data loss, this option will stop the script from running.
- "DROP objects in target but not in project" - This will remove anything in the database that doesn't exist in the project. Useful if you want consistency, but you may want to ensure this isn't checked if there could be objects in the database that were created, but didn't make it to the project.
Under the "Advanced Deployment Options"
- Allow Incompatible Platform - Useful if you may publish to a different version of SQL Server than the one specified in the project
- Include transactional scripts - Will run the entire update operation as a transaction. If any one part fails, the transaction will roll back. If you have cross-database dependencies, selecting this option could result in no changes being published if you're publishing to a new server. For a new publication, you may want to de-select this option to ensure a successful deploy of what can be published.
- Script state checks - This option will ensure that the publish action will only work on the specified server and database.
- Verify deployment - Checks the database and project before publishing to try to ensure there are no changes that will cause problems with the publication such as missing data for a foreign key.
Using Publish Profiles
Once you've set up your publish profiles, you can easily use these to push changes to that server and database without needing to specify additional parameters. The easiest way to use them is to double-click the Publish Profile within the project and choose to either "Generate Script" or "Publish".
Generate Script will generate a script for you to use to update the target at a later time (run in SQLCMD mode).
Publish will immediately attempt to push the changes to the target.
You can also use these at a later point to push changes through the SQLPackage.exe command line.
SQLPackage
To publish your package through a command line we use something like the following:
Code Snippet
- sqlpackage /a:publish /sf:.\sql\Local\Adventureworks2008.dacpac /pr:.\Publish\Local.publish.xml
The above will:
- Use the "Publish" Action
- Use the Source File named Adventureworks2008.dacpac, built in the sql\Local folder
- Use the publish profile named "Local.publish.xml" (defined to push to the local SQL Server)
You may want to add SQLPackage.exe to your path. By default it is installed in:
C:\Program Files (x86)\Microsoft SQL Server\110\DAC\bin
You can override quite a few of the default settings through various command line arguments. This includes source, target, and variables. You can find a full list of the command line arguments at the SQL Package reference online.
Jenkins Automation for CI
We use Jenkins at my current workplace and set up a Jenkins job to do the following (With thanks to Matthew Sneeden for the assistance.):
- Get the latest from our mainline repository
- Build each SQLProj file.
- Building the SLN file will result in also attempting to publish the database
- msbuild .\Adventureworks.sqlproj /t:build /p:Configuration="Local"
- This assumes that msbuild.exe is in your path.
- Configuration is mostly to control the location of the dacpac file generated.
- Run SQLPackage w/ a specified Publish Profile for the appropriate environment and using the newly built dacpac as the source.
We are currently investigating how we can use Snapshot files to better control releases to our UAT and Production environments. This series will be updated when that information is available.


